DIY: Gravity Fed Water Filtration System
Ceramic Water Filter Kit: http://www.internetprepper.com/index.php?main_page=product_info&cPath=76&products_id=258&zenid=8effvojc7s1ft6tnoct4ior931
What you will need to DIY:
1 Ceramic water filter kit- to each
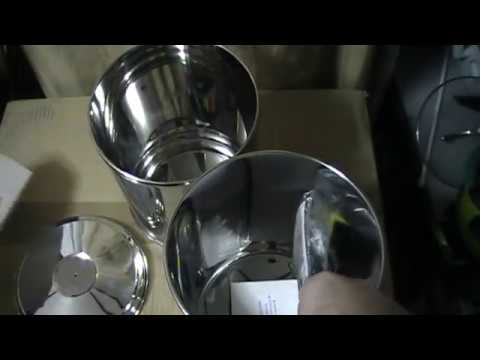
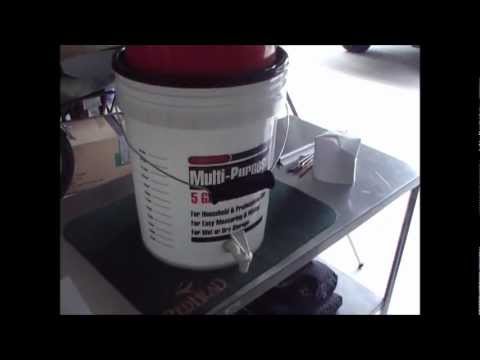
2 five gallon buckets- .50 to .00 each
2 Five gallon bucket lids- .50 each
Tools Needed:
Cordless Drill or electric drill
drill bits 3/4″ and 5/8″ and 1/16″
Ruler
pencil
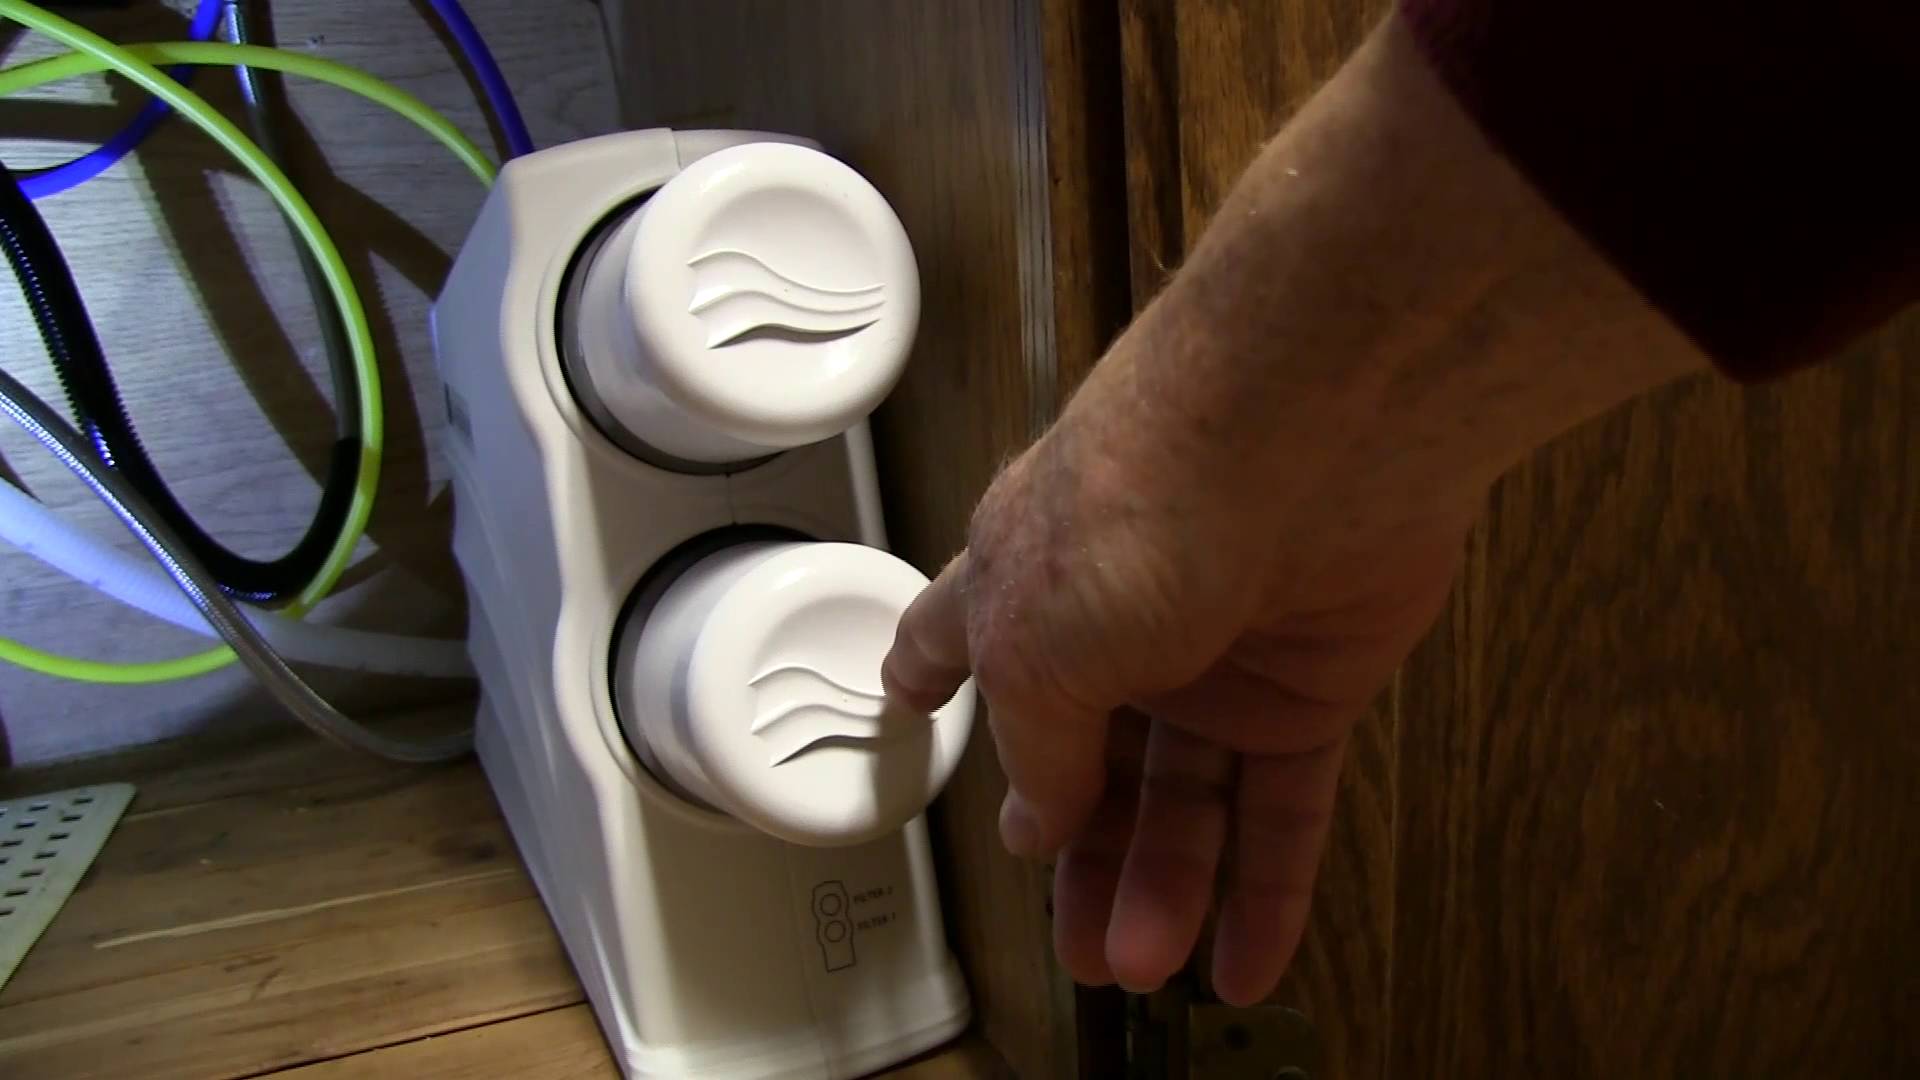
This filter removes water-borne bacterium with a 0.2 micron efficiency which exceeds NSF standards. The ceramic filter can be cleaned with a soft brush at least 100 times, and it produces 14 gallons of drinking water per day.
Simply double stack two clean five gallon buckets with lids, drill a 1/2″ hole in the bottom of the top bucket and through the top of the bottom buckets lid, place sock over filter and install it in the bottom of the top bucket. Drill a 3/4″ hole on the side and near the bottom of the bottom bucket and install the spigot. Fill the top bucket with water from a lake, rain, tap, river or stream and in an hour you will have bacteria free water to drink in the bottom bucket.
Product is silver impregnated and will not permit bacteria growth-through (mitosis) that provides a hostile environment for all microbiological organisms and will not support their growth. Ceramic elements may be cleaned 100 or more times with a soft brush or damp cloth.
Performance Features:
Easy installation
Filter will accept water from floods, lake, rain, well, tap, river or stream
Annual filter replacement
Cleanable with clean damp cloth or soft brush
Do not use soap
IT IS VERY IMPORTANT THAT THERE IS NOT A LEAK AROUND THE FILTER STEM. THE CLEAN WATER, IN THE BOTTOM BUCKET, WILL BE CONTAMINATED BY THE WATER FROM THE TOP BUCKET.
FILLING INSTRUCTIONS
Before using the filter system it is recommended to sanitize the buckets with a diluted bleach solution. 1 teaspoon of bleach mixed with 1 gallon of water will do the job.
Wipe down the outside and the inside of each bucket with the bleach solution. Let stand for 3-5 minutes then wipe off with a dry paper towel or cloth towel.
Assemble the filter unit and set on a level surface.
Fill the top bucket with water.
As water is removed from the bottom bucket add that amount of water to the top bucket.
FLOW RATE
It will usually take a couple of days for the flow rate to reach its’ maximum output—around ¾-1 gallon per hour. The flow rate increases as the ceramic shell and the mixed media (inside the ceramic shell) become saturated with water.
CLEANING INSTRUCTIONS
When the flow rate of the filter decreases, this would indicate that the sock and the filter might need to be cleaned.
Using rubber gloves remove the sock and rinse it in clean water.
As the filter is used and is in contact with dirty water the white ceramic shell will become stained and the pores of the clay will become clogged with particulates.
Using a Scotch-Brite pad (green scrub pad) GENTLY rub the surface of the filter. This will remove some of the stain and the dirt.
Rinse with clean (filtered) water.
Reassemble the filter unit and fill it with water.
NEVER USE ANY TYPE OF SOAP WHEN CLEANING THE BUCKETS, THE SOCK OR THE FILTER. THIS WILL RUIN THE FILTER AND WILL NO LONGER FUNCTION PROPERLY.
IMPORTANT:
Once you start using the filter, the activated carbon is only good for about 12 months. The ceramic shell, which is filtering out the bacteria, will last between 1-2 years. The carbon, inside the ceramic shell, will become packed over a period of time and you will need to shake the filter, to loosen the carbon. Replacing the filter depends upon the flow rate. If the flow rate is very slow even after cleaning the filter, it should be replaced.